Yes, you're reminded of it every time you put the clothes in and take them out, but you just ignore it. Then, the overwhelming feelings of guilt and neglect come as you realize the performance of your dryer is not doing so great. Finally, you force yourself to do this hairy and furry little job of pulling out the lint screen and scraping off the huge pile of what looks like a cashmere sweater and you leave it at that.
However, we really do need to take a closer look at the fire hazards inside this little monster. There are thinks lurking down there that we've never even seen, or perhaps lost. There are 3 pieces and each hide a lot of lint. Don't be afraid of the idea of taking apart this little lint trap. It's easier than you think and probably a lot dirtier than you ever imagined.
What you'll need: A screwdriver, A bottle nipple brush (or other small brush with a long handle), a spray bottle with cleaner ( i used my tea tree oil spray), a dry cloth, and your vacuum. (And the ability to put part of your body inside the dryer) If you are unable to squeeze inside far enough to see, JUST use a mirror to see what you're doing!
 TIP:If you don't have a Whirlpool front load dryer; i'm not sure of the details, but it may be real similar, so look at your manual if in doubt, or like me....just tackle it yourself, just remember where everything goes back!
1. Take out the regular lint screen and set aside (clean now or last, it's up to you).
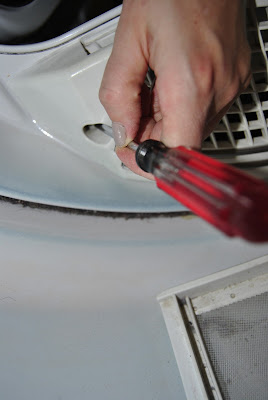
Stick your head inside the dryer to locate the 3 casing's screws for the lint trap and take them out. Lefty Loosey, Righty Tighty. Set the casing down in the dryer and screws onto a piece of tape, so they won't roll away.
When you take the screws out, the casing will be attached to some wires, which connects to the heating element.
Caution: Don't try to take these out or touch with your screw driver, possible shocking hazard. Option 2. unplug dryer, use alternate light source if you're afraid you might touch electrical
 |
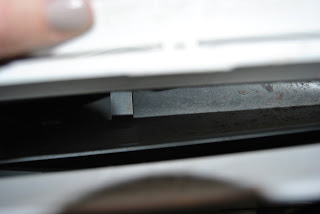
| The metal strips are the thermostat/heat sensor element |
 |
| Lay the casing down inside the dryer drum, it will reach |
2. Next, you'll see the interior casing with a lip that holds the dryer screen. It looks like this:
Locate the top of this piece and gently slide it down and out. It will simply pop out. Pay attention to all edges so you can pop it back into place later easily.
3. Now, its time to start cleaning. Take your brush and scoop out all the lint in all those tiny crevices, being careful not to directly touch the metal connectors. However, there is lint trapped under the wires and deep down in the vent housing.
Continue to remove lint as far down as you can reach and finish up with a damply sprayed cloth and remove final residue.
4. Now, take a look at the drum and locate the circular lint guard that lines the back and front, by the door. This is trapped with all kinds of lint. Just take your brush and scrub away. You'll be surprised.
5. Take each piece of the lint screen and casing and first clean with your brush, then wipe with damp cloth. You'll need to clean out each square of the grid on the lint casing (i know, not fun)
6. Pop the piece back in that looks like this: first locating the small lip it goes into and nestle down into the plastic holders with the writing facing you "insert lint screen" should be on top. Then, Pop goes the weasle.
7. Take the outer casing and place it back over the screw holes and screw them back in. Remember all 3!

8. Now, just wipe out the drum removing all excess lint. Then, vacuum out the small pieces. If you vacuum out before- then you'll be cleaning out your filter on your vacuum....that's not fun either.
Now, your dryer can thank you, perform a little better and safer for you.
Note: There also should be general cleaning done in and around the dryer hose that attaches to the wall. Also, every 6 months you should pull the dryer out and clean underneath and behind to reduce the fire hazard there.
Like we all have time to do this(not really); however a good reminder when you have a little motivation and confidence,you'll have the peace of mind knowing that you're family is safer & plus you did it, girl. Awesome job!


No comments:
Post a Comment