 |
| A Wreath I designed last spring |
Spring is Amost here: I can design your Spring Wreath or A boxwood wreath would be perfect! Look at the post below to see details or check out the post for spring wreath.
If you have some boxwoods that need trimming or desire a different material trimmed; just give me a call (local orders only) Some great examples from potterybarn:


(post from pre-christmas 2012)Merry Christmas everyone! 'Tis the season to make a beautiful wreath for your door.
If you have some boxwoods that need trimming or desire a different material trimmed; just give me a call (local orders only) Some great examples from potterybarn:
A great whimsical idea for Easter! I was hoping to make this for Livia in Onederland's first birthday party, but I ran out of time! See Petals and Plumes-Hats and Boots for her other designs.

(post from pre-christmas 2012)Merry Christmas everyone! 'Tis the season to make a beautiful wreath for your door.
I am taking early orders to make a custom Boxwood/Christmas winter Wreath. There are 3 basic price points, $20, $25 & $35. If you would like something specially customized, I will gladly make it and will give you a custom price. These will look fresh for at least 4 weeks and will dry beautifully and then can be used each season outdoors or placed indoors for a luxury indoor design style. (Special Care is required to preserve your boxwood wreath)
Note: Retail Wreaths usually start at $45, so these are for local orders & delivery only.
Option 1: $20
Fresh Boxwood Wreath
Square (18-24") or Round (24-28"w)
Option 2: $25 and up
Fresh Boxwood Wreath
Square (18-24")or Round (24-28"w)
With Wide Ribbon Bow or Loop , Your choice color of Luxury Ribbon Or Burlap
Option 3: $35 and up
Fresh Boxwood Wreath
Square (18-24") or Round (24-28")
With Wide Ribbon Bow or Loop, Your Choice of Luxury Ribbon or Burlap and a Monogram Letter to match your Style
Ideas of Additional Extra's: Faux Berries, Mixed Greenery, Ornaments, Miniature chalk board sign, Oversized Wreath, Multiple wreaths for windows, Indoor wreaths for Table Settings, Lighted Boxwood Wreath
Option 4:
In Home Christmas Decorating for the Holidays
$15 Consultation and Christmas Party Planning
Help In Actual Decorating: Personal Estimates given at Consultation
Note: I am not a licensed interior designer, nor do I advertise my services as professional in any way.
Note: The boxwoods will turn brown when drying, please spritz with water to prevent early drying. If you want to preserve, please see note below. You may want to spray the wreath green next year or possibly a gold or silver color to change it up.
Note: The boxwoods will turn brown when drying, please spritz with water to prevent early drying. If you want to preserve, please see note below. You may want to spray the wreath green next year or possibly a gold or silver color to change it up.
If you have a certain shrub, bush or tree you'd like me to trim to make into a wreath, I will have a special price for those orders.
Here are some samples to give you an idea of a custom order:
 |
| Triple Fir Tree Wreaths with a Connecting Ribbon |
 |
| Pottery Barn Ivy Kissing Balls http://ab.pbimgs.com/pbimgs/ab/images/dp/wcm/201227/0005/img40u.jpg |
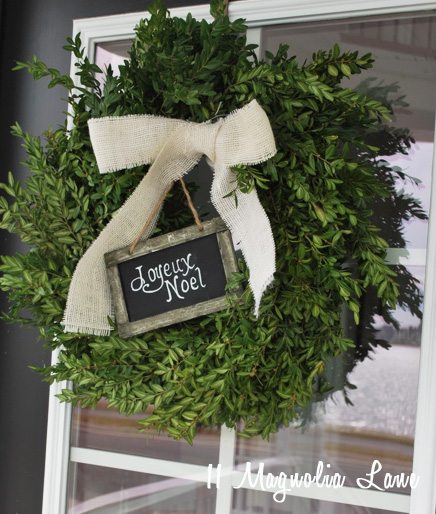 |
| Sample from Magnolia Lane Blog :Boxwood Wreath with burlap bow and chalkboard sign |
 |
| Option #2 Sample |
 |
| Juniper Tree Wreath Sample |
 |
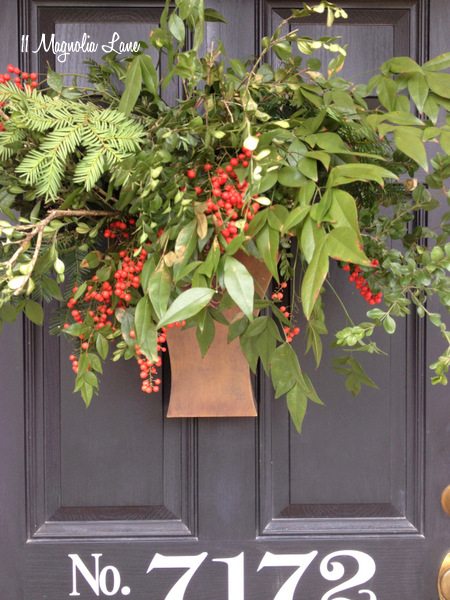
| Pottery Barn Eucalyptus & Red Berries Wreath |
 |
| Pottery Barn : Fir, Eucalyptus and Silver Ornaments Wreath |
Here are some samples of wreaths I have done :

 |
| round boxwood wreath after a trim, burlap bow |
 |
| Square Boxwood wreath with holly berries, pic before ribbon added |
Bird House Easter Wreath (see post)
Birthday Livia in Onederland Mesh Wreath (see post)
Scarecrow Wreath (see post)
Fall Leaves Wreath
Researched Instructions from E-how.com
Special Care Instructions If preserving for indoors or outdoors : In order to maintain a longer fresh look, simply spritz with a spray bottle of water daily. Wreaths will need to be brought in in January out of the sun to dry successfully for next year. You can purchase a special preserver to spray on after bringing indoors, or simply use hairspray to maintain the shiny look.
Before assembling your wreath, I will soak the stems in glycerin water and use some green food coloring to help preserve the maximum freshness possible.
Note: The heat and sun will not be kind to your wreath for extended uses outdoors. If using immediately indoors ,just hang outside at night during the preservation process during the cold weather.


